How-to
How to Write a Check Correctly in 2026 (Step-by-Step Guide)
Writing a paper check may feel old school in a world of apps and instant transfers. However many landlords, schools, and small businesses across the United States still accept them every day. If you have ever paused with pen in hand wondering how to write a check, you are not alone. The process looks formal, yet it follows a simple pattern once you understand it. Learning how to fill out a check correctly protects your money and prevents errors. From adding cents to knowing where to sign a check, each step matters. This quick guide to check writing instructions will help you feel calm, careful, and confident.
How to Write a Check: Step-by-Step Instructions and Examples
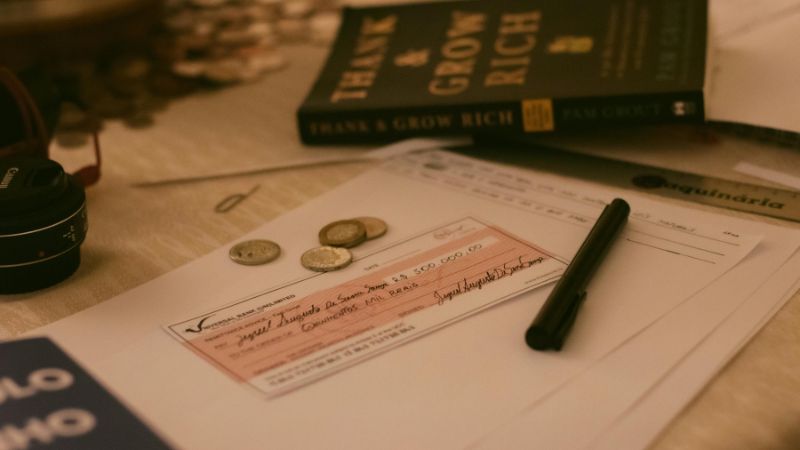
Although checks look formal, they follow a predictable structure. Once you understand the layout, you can handle any personal check example with confidence. Let us walk through the process carefully.
Step 1: Write the Date
First look at the top right corner. Write today’s date clearly. This confirms when the payment begins processing. Banks rely on dates for signature verification banking and fraud screening.
For example: March 4 2026.
Never postdate unless necessary. Doing so may create confusion.
Step 2: Add the Payee
Next move to “Pay to the order of.” Here you write the full legal name of the recipient. This step defines who can legally deposit the check.
If you are paying rent, write the landlord or company name exactly as instructed. This answers the common question of how to write a check for rent correctly.
Avoid leaving this blank. Also avoid casual shortcuts. Precision matters in checking account management.
Step 3: Write the Amount in Numbers
Now shift to the small box on the right. Enter the amount in digits. Example:
$850.75
Write clearly. Avoid scribbles. This numeric value must match the written words below. Many people ask how to write dollars and cents on a check. The key is accuracy and legibility.
Step 4: Write the Amount in Words
Below the payee line you spell out the amount. For instance:
Eight hundred fifty and 75/100
If there are no cents write 00/100. This clarifies the total. Knowing how to write a check with cents prevents rejection by the bank.
Draw a line after the words to block alterations. This small action supports check fraud prevention tips and strengthens security.
Step 5: Fill in the Memo Line
Although optional, the memo line is helpful. It explains the purpose of payment. Understanding the check memo line meaning improves record tracking.
Examples:
- April Rent
- Invoice 1023
- Tuition Payment
Businesses often request account numbers here. Therefore include requested details carefully.
Step 6: Sign the Check
Finally sign the bottom right corner. Use your official bank signature. This step authorizes payment. Without it the check is invalid.
If you wonder where to sign a check, always look at the lower right front side. The back is reserved for endorsements.
Quick Reference Table
| Section | What to Enter | Why It Matters |
|---|---|---|
| Date | Current date | Confirms timeline |
| Payee | Full legal name | Identifies recipient |
| Amount Box | $850.75 | Numeric clarity |
| Amount Line | Eight hundred fifty and 75/100 | Legal confirmation |
| Memo | April Rent | Tracking purpose |
| Signature | Your official signature | Authorizes payment |
Avoiding Common Check Mistakes
Even careful people slip. However you can prevent most issues with simple awareness.
Never ask “can I write a check in pencil?” The answer is no. Pencil invites tampering. Always use blue or black ink.
If you make an error do not scratch it out. Instead learn how to correct a mistake on a check by voiding it. Write VOID across the front clearly. Record the number in your register.
Also understand how to make a check payable to cash. While legal it is risky. Anyone holding it may deposit it.
If paying two people you must know how to write a check to two people properly. Use “and” if both must sign. Use “or” if either may sign.
How to Endorse and Deposit a Check
Writing is only half the journey. You must also know how to endorse a check and deposit it correctly.
To endorse:
- Turn the check over.
- Sign inside the endorsement area.
If transferring it learn how to sign over a check to someone else. Write “Pay to the order of” followed by their name below your signature.
Next consider deposit options. Many banks offer mobile solutions. The mobile check deposit process allows you to snap photos using your banking app. Follow the mobile banking check deposit guide provided by your bank.
Alternatively visit an ATM. Follow posted ATM check deposit instructions carefully.

Check Expiration and Validity
Checks do not last forever. Many banks follow check expiration rules that limit validity to 180 days. Therefore ask yourself how long are personal checks valid before issuing older stock.
If a check sits uncashed too long contact the recipient. Otherwise funds may remain tied up unnecessarily.
How do you balance a checkbook?
Digital banking is convenient. However knowing how to balance a checkbook builds financial discipline. Think of it as aligning your personal record with your bank’s record.
Each time you write a check record it immediately. Strong check register record keeping prevents overdraft surprises.
Steps to Balance Properly
- Record every check number.
- Subtract payments promptly.
- Add deposits immediately.
- Compare totals with your statement.
- Adjust for outstanding checks.
Many people use a balancing a checking account worksheet for clarity. This worksheet lists deposits, withdrawals, and differences clearly.
Knowing how to record checks in register protects you from unnoticed bank fees.
Sample Check Register
| Date | Description | Payment | Deposit | Balance |
|---|---|---|---|---|
| 04/01 | Opening Balance | — | — | $2,000 |
| 04/03 | Check #110 Rent | $850 | — | $1,150 |
| 04/05 | Paycheck | — | $1,200 | $2,350 |
Notice how each entry updates the running balance. This habit strengthens checking account management skills.
Advanced Tips for Smart Check Users
Although checks seem simple, small strategies enhance security.
First apply strong check fraud prevention tips. Avoid leaving blank spaces. Never pre sign blank checks. Store unused checks securely.
Second understand your account features. Some banks offer a checking account without monthly fee while others provide an interest earning checking account. Choose based on your needs.
Third know how to order more checks. Most banks allow you to reorder checks online or reorder checks from bank branches quickly.
Real Life Scenario
Imagine you write a $500 check for home repairs. The contractor delays cashing it. Your mobile app shows a higher balance. However your register reminds you of the pending payment. Because you practiced write a check step by step discipline and recorded it properly you avoid overspending.
That awareness reflects strong financial habits.
Final Thoughts
In a fast digital world paper checks remain relevant. Therefore mastering how to write a check correctly equips you with practical confidence. From understanding how to fill out a check example to following check writing instructions, each detail matters.
Moreover combining writing skills with balancing skills creates complete financial awareness. When you know how to write, endorse, deposit, and track checks you control your money instead of guessing about it.
Checks may seem old fashioned. However financial clarity never goes out of style.
FAQ
1. How to Write a Formal Check / Official Check
Writing a formal or official check is very similar to a personal check, but it is usually used for business, government, or institutional payments. Follow these steps:
- Date the check : write the current date at the top right corner.
- Payee name : write the full legal name of the company, institution, or person receiving the money. Avoid nicknames.
- Amount in numbers : enter the exact amount in the small box, e.g.,
₹2,00,000or$2,000. - Amount in words : spell out the total amount clearly. Example:
- ₹2,00,000 → “Two lakh only”
- $2,000 → “Two thousand and 00/100 dollars”
- Memo line (optional) : include reason for payment like “Invoice #1234” or “Consulting Fee.”
- Sign the check : use your official signature as registered with your bank.
Tip: Always use black or blue ink, avoid pencil, and fill all spaces to prevent alterations.
2. How Do I Write a Cheque / Check-in Correctly?
Whether you call it a “cheque” (common in UK/India) or “check” (US), the steps are similar:
- Start with date.
- Fill the payee’s full name.
- Enter the amount in numbers and words.
- Optional memo line for reference.
- Sign at the bottom right.
Example (Formal, India):
Date: 04/03/2026
Pay to the order of: ABC Pvt Ltd
Amount: ₹2,00,000
Amount in words: Two lakh only
Memo: Invoice 9876
Signature: ____________
3. Is it “2 lakh” or “2 lacs”?
- The correct formal spelling is 2 lakh.
- “Lac” or “lacs” is informal, often used in casual speech, but banks and official documents prefer “lakh.”
4. Key Tips for Writing Official / Formal Checks
- Always write clearly and in a straight line.
- Avoid abbreviations or slang in payee names or amounts.
- Fill the entire line for the amount in words to prevent fraud.
- Double-check numbers and spellings before signing.
- Keep a record in your check register for tracking.