How-To Tutorials & Troubleshooting
How to Take a Screenshot on Windows: The Ultimate Guide
Screenshots have become an essential part of our digital life. Whether you’re capturing a funny meme, saving a receipt, troubleshooting a technical issue, or creating tutorials, knowing how to take a screenshot on Windows is a must.
The good news? Windows offers multiple built-in ways to capture your screen, and there are also third-party tools for advanced needs. This guide will walk you through all the methods to screenshot on Windows from quick keyboard shortcuts to advanced tools like Snip & Sketch.
Why Take a Screenshot on Windows?
Screenshots are useful in many scenarios:
- Save proof of payments and transactions
- Report technical issues with visuals
- Create guides and tutorials
- Capture memories from videos or games
- Share funny or interesting content
Method 1: Print Screen (Prt Scn) Key
The simplest way to take a screenshot on Windows is by using the Print Screen button.
How it works:
- 1.Press PrtScn (Print Screen) on your keyboard.
- 2.The screenshot will be copied to your clipboard.
- 3.Open Paint, Word, or any image editor and press Ctrl + V to paste it.
- Save the file in your preferred format.
Note: This captures the entire screen.
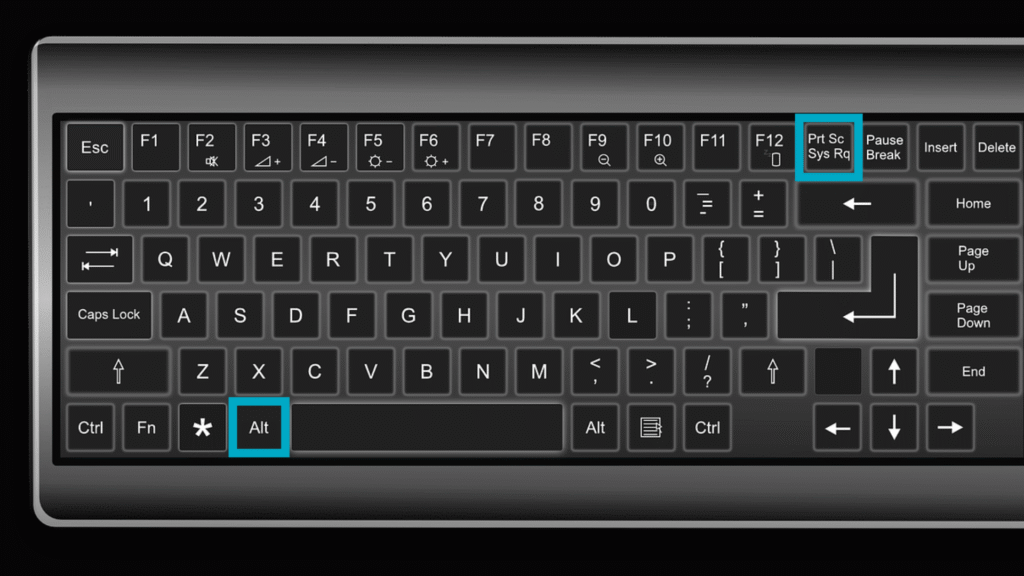
Method 2: Alt + Print Screen (Active Window)
If you only want to capture the active window instead of the whole screen:
- Press Alt + PrtScn.
- Paste the screenshot into Paint or another editor.
This is great when you have multiple apps open but only want to capture one window.

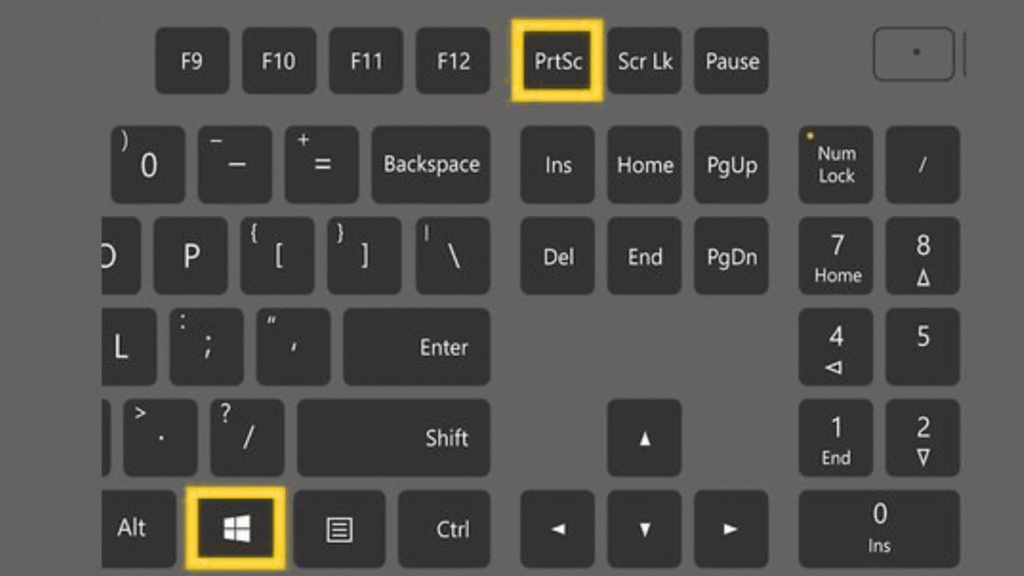
Method 3: Windows Key + Print Screen (Auto-Save Screenshot)
Want your screenshot to save automatically?
- Press Windows Key + PrtScn.
- Your screen will dim briefly, confirming the screenshot.
- The file is automatically saved in:
Pictures → Screenshots folder
Method 4: Snip & Sketch Tool (Windows 10 & 11)
Snip & Sketch is a modern screenshot tool built into Windows.
Steps:
- Press Windows + Shift + S.
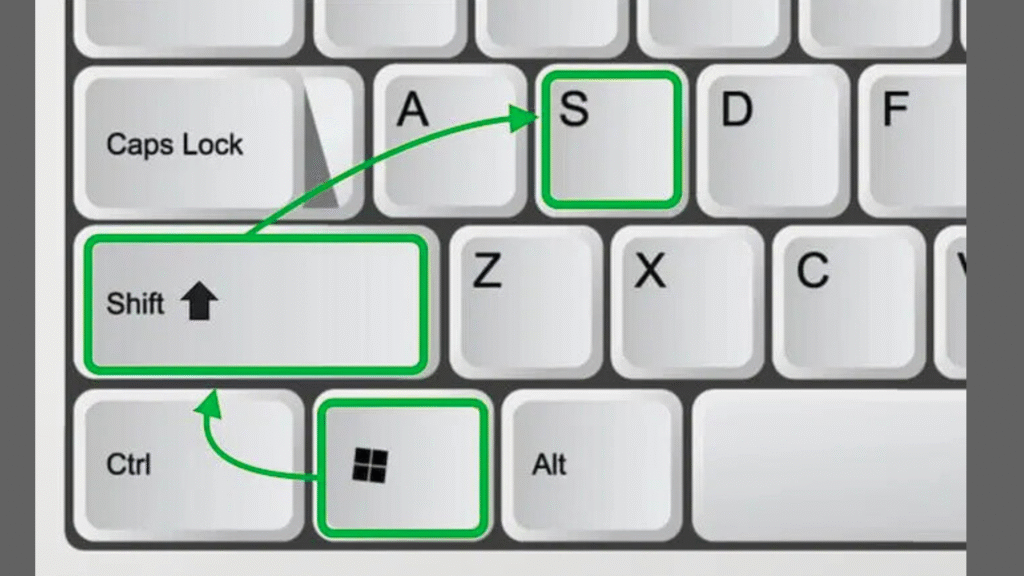
- The screen will dim, and a small toolbar appears with options:
- Rectangular snip
- Freeform snip
- Window snip
- Fullscreen snip
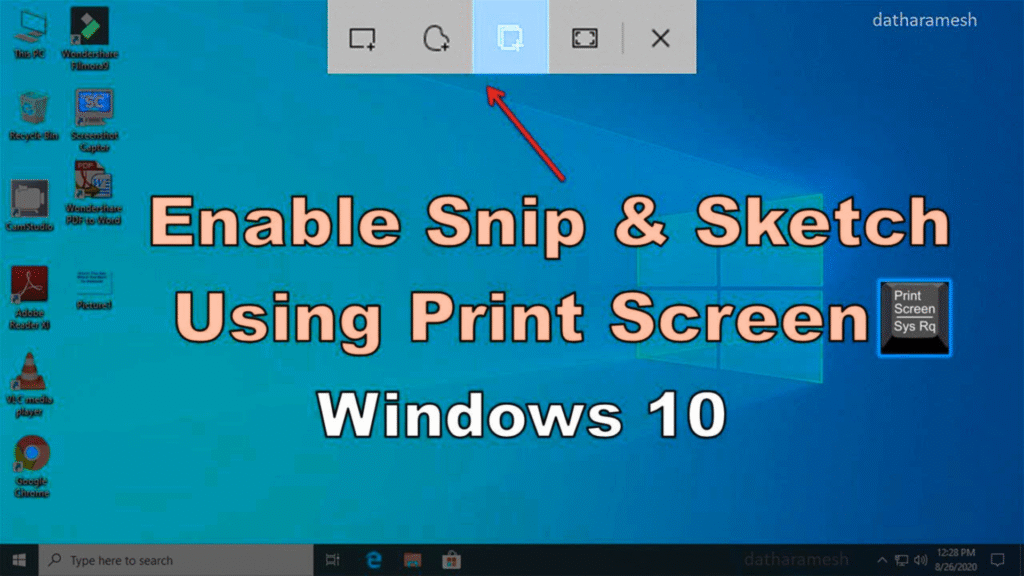
- Select your snip type, and the screenshot will be copied to your clipboard.
- A notification will appear click it to edit, annotate, or save the screenshot.
Method 5: Snipping Tool (Classic Windows Utility)
The classic Snipping Tool still exists in Windows.
- Open Snipping Tool from the Start menu.
- Choose New → select your capture area.
- Edit and save the screenshot.
This is useful if you want more control and simple editing features.
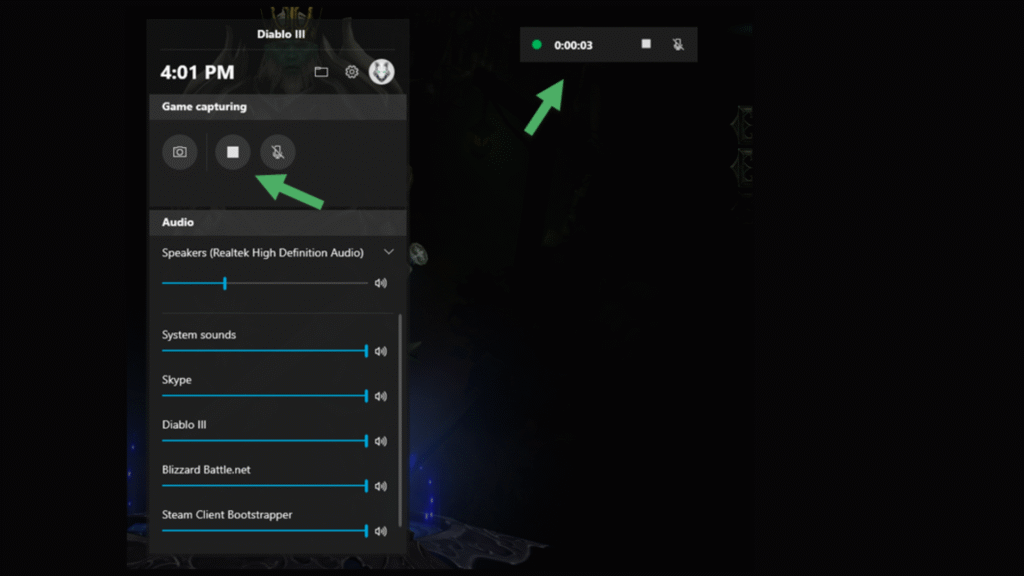
Method 6: Game Bar (For Gamers)
Windows has a built-in Xbox Game Bar for gamers.
How to use:
- Press Windows + G.
- Select the Capture option.
- Click the camera icon to take a screenshot.
- Screenshots are saved in Videos → Captures folder.
Method 7: Third-Party Tools
If you need advanced options, try these tools:
- Greenshot : lightweight, free, customizable
- Lightshot : simple and quick sharing
- ShareX :advanced tool with screen recording & automation
- Snagit : professional screen capture & editing (paid)
Tips for Better Screenshots
- Use Alt + Tab to quickly switch to the right window before capturing.
- Use Ctrl + V to paste directly into chat apps like WhatsApp Web or Slack.
- For professional use, annotate screenshots with arrows, highlights, or blur sensitive info.
- Rename screenshots for easy organization.
Frequently Asked Questions (FAQ)
1. Where do screenshots go on Windows?
- If you use PrtScn or Alt + PrtScn, they go to the clipboard (you need to paste).
- If you use Windows + PrtScn, they’re saved in Pictures → Screenshots.
2. How do I take a scrolling screenshot in Windows?
Windows doesn’t have a built-in scrolling screenshot feature. Use third-party tools like ShareX or Snagit.
3. Can I screenshot only part of my screen?
Yes! Use Windows + Shift + S and drag the area you want.
4. How do I take a screenshot on dual monitors?
- PrtScn captures both screens.
- Windows + Shift + S lets you select one monitor or part of it.
5. Do screenshots reduce image quality?
No, screenshots are saved in high resolution (the same as your screen’s resolution).
Conclusion
Taking a screenshot on Windows is quick and easy once you know the shortcuts. From the simple Print Screen button to advanced tools like Snip & Sketch and Game Bar, Windows gives you plenty of options.
For everyday tasks, Windows + Shift + S is the most versatile method. But if you need automatic saving, go with Windows + PrtScn. And for professionals, third-party apps like Snagit or ShareX provide even more control.