
How-to Guides
How to Screenshot on Mac: The Complete 2026 Guide
Taking a screenshot on a Mac has never been easier, and knowing how to screenshot on Mac can save time and boost productivity. Whether you want to capture the entire screen, a specific window, or just a selected portion, macOS provides simple and powerful shortcuts. With tools like the Screenshot toolbar, floating thumbnail previews, and options to save or copy to clipboard, you can quickly organize and edit your captures. From Touch Bar screenshots to screen recording features, mastering these techniques ensures you never miss important content. Learn step-by-step methods to take, edit, and manage Mac screenshots efficiently
In this ultimate guide, we’ll explore everything you need to know about screenshots on Mac, including shortcuts, built-in apps, editing options, third-party tools, troubleshooting, and pro tips.
Why Screenshot on Mac
Screenshots are more than just quick images. They serve multiple purposes:
- Work productivity: Capture and share important documents, emails, or notes.
- Design inspiration: Save ideas from websites, apps, and software.
- Education & tutorials: Create step-by-step guides or training material.
- Tech support: Share error messages or configurations with IT teams.
- Personal use: Save receipts, social media posts, or memorable moments.
On a Mac, taking screenshots is quick, versatile, and highly customizable.
Methods to Take Screenshots on Mac
Apple gives you multiple ways to take screenshots, each designed for different needs. Let’s dive into the options:
1. Capture the Entire Screen
Shortcut: Command (⌘) + Shift + 3

This captures everything on your screen and saves it as an image file.
- Where it saves: By default, the screenshot is saved on your desktop with the file name “Screenshot [date] at [time].png.”
- When to use: Useful when you want a full view—presentations, meetings, or recording everything happening on your display.
2. Capture a Portion of the Screen
Shortcut: Command (⌘) + Shift + 4
When you press this combination, your mouse pointer turns into a crosshair.

- Step 1: Drag the crosshair to select the area you want to capture.
- Step 2: Release the mouse or trackpad to take the screenshot.
Pro Tip: If you hold the Spacebar after dragging, you can move the selection box around.
3. Capture a Specific Window
Shortcut: Command (⌘) + Shift + 4 + Spacebar
This is perfect if you only want to capture a particular window (like Safari, Finder, or an app).
- After pressing the keys, your pointer becomes a camera icon.
- Move the camera over the window you want to capture.
- Click once, and macOS will screenshot only that window.
The result includes a subtle shadow effect for better aesthetics.
4. Screenshot Menu with Preview Options
Shortcut: Command (⌘) + Shift + 5

This opens the Screenshot Toolbar, which is one of the most powerful features in macOS.
Screenshot Toolbar (⌘ + Shift + 5)
- Inline improvements to add:
- Screen recording tip: “The Screenshot toolbar also lets you record your screen either the entire display or a selected area.
- Save location tip: “You can change the default save location directly from the toolbar.”
- Clipboard tip: “Hold the Control key while capturing to copy the screenshot to your clipboard for quick pasting into documents or emails.”
5. Capture the Touch Bar (for Macs that have it)
Shortcut: Command (⌘) + Shift + 6
If you’re using an older MacBook Pro with a Touch Bar, you can capture its contents with this shortcut.
Where Do Screenshots Save on Mac?
By default, screenshots are saved to your Desktop. However, you can change the save location.
- Press Command (⌘) + Shift + 5.
- In the options menu, select your preferred folder (Desktop, Documents, Clipboard, Mail, Messages, or Preview).
- You can even set a custom folder for all screenshots.
Editing Screenshots Instantly
macOS allows you to edit screenshots right after taking them:
Suggest adding visuals of the floating thumbnail with annotations.
Copying Screenshots to Clipboard
If you don’t want a file saved on your computer and prefer pasting the screenshot directly into an app (like Word, PowerPoint, or Photoshop), you can:
- Hold Control while using a screenshot shortcut.
- For example: Command (⌘) + Control + Shift + 3 captures the entire screen and copies it to the clipboard.
- Paste it anywhere using Command (⌘) + V.
Using Preview to Take Screenshots
The Preview app also lets you capture screenshots.
Steps:
- Open Preview.
- From the top menu, select File > Take Screenshot.
- Choose from:
- From Selection
- From Window
- From Entire Screen
This is useful for those who prefer menus over shortcuts.
Using QuickTime for Screen Recording
If you want to capture not just still images but also video:
- Open QuickTime Player.
- Go to File > New Screen Recording.
- Choose whether to record the full screen or part of it.
This is great for tutorials, demos, or presentations.
Third-Party Screenshot Tools for Mac
Although macOS’s built-in features are excellent, some users prefer third-party apps
While macOS provides built-in screenshot tools, optional apps like Snagit or CleanShot X can offer advanced features for advanced options.
1. Snagit
- Paid but powerful.
- Advanced editing, scrolling capture, and templates.
2. CleanShot X
- Minimal design, cloud storage, and annotations.
- Popular among developers and writers.
3. Lightshot
- Free, lightweight, and quick sharing.
4. Skitch (by Evernote)
- Simple markup and annotation features.
Troubleshooting Common Screenshot Issues
1. Screenshots Not Saving
- Check if you accidentally changed the save location in Command (⌘) + Shift + 5.
- Make sure your desktop isn’t full or restricted.
2. Keyboard Shortcuts Not Working
- Go to System Settings > Keyboard > Shortcuts > Screenshots and ensure they’re enabled.
3. Poor Image Quality
- By default, screenshots are saved in PNG format, which is high-quality. If you converted to JPG, quality might drop.
Third-party apps like https://screen.studio
Pro Tips for Better Screenshot Management
- Change Default Format:
- Use Terminal to change from PNG to JPG, TIFF, or PDF. Example:
defaults write com.apple.screencapture type jpg killall SystemUIServer
- Use Terminal to change from PNG to JPG, TIFF, or PDF. Example:
- Organize Automatically:
- Create a “Screenshots” folder and set it as the default save location.
- Take Screenshots with Siri:
- Just say: “Hey Siri, take a screenshot.”
- Use Multiple Displays:
- On multi-monitor setups, Command (⌘) + Shift + 3 captures all screens.
Final Thoughts
Taking screenshots on a Mac is incredibly flexible. Whether you’re capturing the full screen, a small selection, or recording video tutorials, macOS has you covered with intuitive shortcuts and built-in tools. Add in third-party apps, and the possibilities are endless.
By mastering these techniques, you’ll save time, boost productivity, and make your workflow much smoother.
Frequently Asked Questions (FAQ)
Q1: Can I take a screenshot on Mac without the keyboard?
Yes, open the Screenshot Toolbar using Launchpad > Other > Screenshot.
Q2: How do I take a scrolling screenshot on Mac?
Mac doesn’t support this natively, but apps like Snagit or CleanShot X can.
Q3: How do I change where screenshots are saved?
Press Command (⌘) + Shift + 5, click Options, and select your save location.
Q4: Can I schedule screenshots on Mac?
Not natively. But third-party tools like Snagit or Automator scripts can do it.
Q5: Why are my screenshots blurry when shared?
This usually happens if the platform compresses images (e.g., WhatsApp or Slack). Use PNG for best clarity.
For more guide please visit these articals
How-to Guides
How to Remove a Virus from Android (Complete Guide 2026)
Your Android phone stores your photos, passwords, banking apps, and private messages. So when something feels wrong, panic is natural. Learning how to remove a virus from Android can save your data, money, and peace of mind. Most people say “virus,” yet the real threat is malware like spyware, adware, or ransomware. Still, the solution begins the same way. You need clear steps, smart tools, and calm action. In this guide, you will discover exactly how to remove a virus from Android safely. More importantly, you will learn how to protect your device so it stays secure long after the cleanup is done.
How to clean your phone from virus
First, pause and breathe. Panic causes mistakes. Smart action removes threats.
If you want to clean phone of malware, start with the basics. Clear unnecessary storage. Delete unknown apps. Check permissions. Many infections hide inside harmless-looking tools downloaded outside the Google Play Store.
Here is your first defense layer:
- Use clear cache Android from app settings
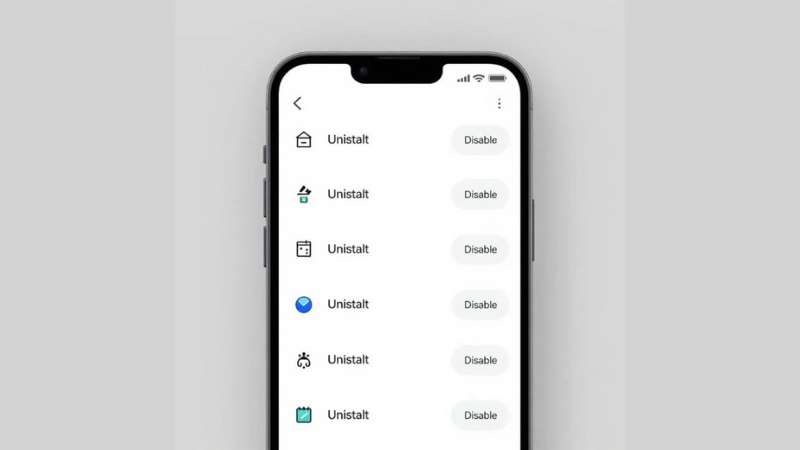
- Uninstall suspicious apps immediately
- Run a scan phone for malware using a trusted Android antivirus app
- Enable Google Play Protect
- Review mobile data usage for strange spikes
Sometimes the infection is simple Adware throwing Pop-up ads everywhere. Other times it is Battery draining malware secretly mining crypto. Think of malware like termites. You may not see them. Yet the damage grows quietly.
For example, a small flashlight app once requested microphone access. That is absurd. A flashlight needs light permission only. Such red flags scream trouble.
Here is a quick risk table:
| Symptom | Possible Cause | Immediate Action |
|---|---|---|
| Random ads | Adware | Remove unknown apps |
| Slow phone | Spyware or Rootkit | Run Malware scan |
| Locked screen | Ransomware | Disconnect internet |
| High data usage | Spyware | Check app permissions |
Small steps matter. They build real Android virus protection.
How to get rid of a virus on your Android phone: Step-by-Step
Now we go deeper. If your phone acts strange, follow this structured plan.
Start with isolation. Disconnect from WiFi. A Spoofed network or Public WiFi risk often spreads malware. Hackers love coffee shops.
Then restart in Safe Mode. This disables third-party apps. If the issue stops, a malicious app is the culprit. That narrows your hunt.
Next actions:
- Reboot in safe mode
- Remove malicious apps
- Change Google password
- Strengthen Google Account security
- Enable 2-Step Verification Android
- Activate Multi-Factor Authentication (MFA)
Why change passwords? Because many Trojan horse attacks steal credentials during a Phishing attack. A simple password reset can block a future Data breach.
For extra safety, install Malwarebytes or Malwarebytes Mobile Security from the official Google Play Store. A proper Malware scan detects hidden Keylogger or Rootkit threats invisible to you.
Here is a structured flow diagram:
Detect Issue
↓
Disconnect Internet
↓
Enter Safe Mode
↓
Delete suspicious apps
↓
Run antivirus for Android
↓
Update passwords
↓
Enable Android virus protection
Each step strengthens your mobile cybersecurity posture. Skip none.
Does resetting a phone remove a virus?
Factory reset sounds dramatic. Sometimes it is necessary.
Yes, factory reset Android can remove most malware. It wipes everything. Apps, files, hidden infections. However, it is a nuclear option.
Before resetting:
- Backup clean files only
- Avoid restoring infected apps
- Update the Android operating system after reset
Think of reset like demolishing a termite-infested house. You remove the structure. Yet if you reuse contaminated wood, termites return.
Important note. Advanced Rootkit infections rarely survive reset. Still, firmware-level attacks need professional repair.
According to Google Security Blog (https://security.googleblog.com), keeping system updates active reduces 95 percent of exploit-based attacks. Updates patch vulnerabilities quietly.
Reset wisely. Not blindly.
How to remove viruses from a phone that won’t turn on
A phone that refuses to boot feels terrifying. Yet do not assume the worst.
Often the issue is hardware. Sometimes severe Ransomware corrupts startup files. If recovery mode works, try factory reset from recovery.
If recovery fails, professional service is required. You cannot manually remove a Rootkit without specialized tools.
Here is your action ladder:
- Charge fully
- Attempt recovery mode reset
- Avoid random repair apps
- Contact manufacturer support
Do not download shady PC tools promising miracle Android malware removal. Many are scams.
When your device is dead, patience beats panic.
How do I know if my phone has a virus: How to check for viruses on Android
Your phone whispers before it screams. You must listen.
Warning signs include:
- Strange Pop-up ads
- Unknown Suspicious apps
- Rapid mobile data usage
- Fast battery drain
- Apps crashing
Here is a quick symptom checklist:
| Behavior | Risk Type |
|---|---|
| Contacts get spam texts | Trojan horse |
| Camera activates randomly | Spyware |
| Phone overheats idle | Keylogger or miner |
| Fake security alerts | Stalkerware |
Run a scan phone for malware using a reputable Android antivirus app. That gives clarity fast.
Malware vs Virus Difference Explained Simply
A virus spreads by attaching itself to files. Malware is broader. It includes Adware, Spyware, Ransomware, and more. So when you search how to remove a virus from Android, you actually mean removing malware. The solution focuses on secure Android phone practices and layered protection.
Understanding this difference improves decision-making.
Android virus protection
Protection beats repair. Always.
To strengthen Android virus protection, follow these rules:
- Use trusted antivirus for Android
- Keep system updated
- Enable Google Play Protect
- Avoid third-party app stores
- Use VPN for Android for encrypted browsing
- Follow Strong password tips
A VPN for Android adds Privacy protection especially on public WiFi. It encrypts traffic. Hackers see gibberish.
Good password structure:
- 12+ characters
- Mix of symbols and numbers
- No birthdates
Strong Password security blocks 80 percent of breaches instantly.
Security is not paranoia. It is discipline.
Cybersecurity info you can’t live without
Cybercrime evolves daily. Attackers innovate. You must adapt.
According to FBI IC3 reports (https://www.ic3.gov), Americans lose billions yearly to digital fraud. Many cases start with mobile compromise.
Essential knowledge:
- Never click random SMS links
- Verify app developer reputation
- Review permissions monthly
- Monitor banking alerts
Think of cybersecurity like locking your house. You would not leave doors open. So do not leave digital doors open.
Layered defense works best. Antivirus. MFA. VPN. Updates. Awareness. Combined, they create a fortress.
Privacy Preference Center
Privacy matters. Data is currency.
Control app permissions regularly. Visit settings and disable camera or microphone for apps that do not need them. That limits Spyware risks.
Also adjust Google ad personalization settings. Reduce tracking. Review Google Account security dashboard often.
Here is a simple privacy control table:
| Setting | Why It Matters |
|---|---|
| App Permissions | Prevent hidden spying |
| MFA Enabled | Stops stolen login abuse |
| Play Protect On | Blocks harmful apps |
| VPN Active | Shields browsing data |
Digital hygiene is like brushing teeth. Skip it and decay begins quietly.
Final Thoughts on How to Remove a Virus from Android
Learning how to remove a virus from Android empowers you. You are no longer helpless. You know how to remove virus from Android, perform Android malware removal, and build lasting Android device security.
Threats like Adware, Trojan horse, Spyware, and Ransomware will not disappear. However, with structured defense, awareness, and proactive tools, your phone stays secure.
Your Android holds your life. Protect it like it matters. Because it does.
FAQ
How do I manually remove a virus?
Go to Settings > Apps, find unfamiliar or suspicious apps, and uninstall them immediately.
Clear cache, review app permissions, and update your Android system to close security gaps.
How do I get rid of fake virus warning on Android phone?
Close the browser tab showing the alert and clear your browser cache and site data.
Do not tap the warning message, and avoid installing apps from pop-up ads.
How do I clean up and speed up my Android phone?
Delete unused apps, clear cache files, and remove large or duplicate media files.
Keep your software updated and disable background apps draining battery and memory.
What does *#0*# do on Android?
This code opens a hidden diagnostic test menu on some Samsung devices.
It allows you to test screen, sensors, speaker, and other hardware functions.
What does *#21 do to your Android phone?
This code checks call forwarding status on many mobile networks.
It does not hack your phone; it simply shows whether calls are being forwarded.
Related Artical
How to Detect and Remove Spyware From an Android Phone
Is Your Facebook Account Compromised? A Deep-Dive Guide to Spot Hidden Takeovers
wpseo_breadcrumb
home » How-to Guides »
Your Android phone carries your private world in its pocket. Messages, banking apps, passwords, and photos all live there. That is why learning how to Detect and Remove Spyware From an Android Phone is more important than ever. Spyware on Android often hides silently, acting as dangerous Malicious software that steals data without warning. This growing form of Mobile malware can expose your accounts to Cybercriminals and create serious Identity theft risks. You may not notice it at first. The signs can feel small and harmless. However acting quickly protects your privacy, money, and personal information from long-term digital damage.
What is spyware?
Spyware on Android is a form of Malicious software designed to secretly monitor your activity. It falls under the wider category of Mobile malware. Once installed, it collects sensitive data without your consent. This data may include passwords, browsing history, contacts, and even microphone recordings.
Some spyware acts like Hidden spy apps. Others operate as Phone monitoring apps or Stalkerware. Advanced threats such as a Remote access trojan (RAT) allow attackers to control your phone from anywhere. These programs often include Keyloggers, Password stealers, Banking trojans, and Information stealers. Even simple Cookie trackers can expose login sessions. In short, spyware turns your phone into a surveillance device.
What makes spyware so dangerous?
Spyware is dangerous because it attacks silently. You may notice Excessive battery drain or Phone overheating and assume your device is old. However, those symptoms can signal an Android security threat working in the background.
The real danger lies in stolen data. Login credentials theft leads to email compromise. Financial information theft can empty bank accounts. Worse, it may result in Identity theft, which takes months to repair. Many Cybercriminals use spyware to bypass Fraud prevention systems. Once inside your phone, they can read verification codes, intercept messages, and access banking apps. If you ever asked, “Why is my battery draining fast?” spyware might be the hidden answer.
Where does spyware come from?
Most infections begin with unsafe downloads. Users install apps outside the protection of Google Play Store vetting. These apps may look harmless but hide Malicious apps inside. Hackers also use Phishing scams through emails or text messages. One fake delivery link is enough to trigger infection.
Another common method involves permission abuse. Spyware often requests Device administrator permissions. Once granted, removal becomes difficult. Public Wi-Fi networks can also spread threats. When users download files on unsecured networks, attackers exploit vulnerabilities. To Avoid malicious app downloads, always verify the developer and read reviews carefully.
Spyware examples
Real-world spyware shows how serious this threat is. Pegasus is a high-profile surveillance tool that targeted journalists and officials. SpyNote steals messages and call logs. HiddenMiner secretly mines cryptocurrency and slows devices dramatically.
Below is a simplified comparison of known spyware families:
| Spyware Name | Main Function | Risk Level |
|---|---|---|
| Pegasus | Full surveillance | Critical |
| SpyNote | SMS and call tracking | High |
| Agent Smith | App replacement attack | High |
| HiddenMiner | Crypto mining | Medium |
Many Stalkerware apps pretend to offer parental control. In reality, they enable secret monitoring. If you want to Stop phone surveillance, understanding these examples helps you recognize patterns early.
How to detect spyware on Android phone
Learning How to detect spyware on Android phone begins with recognizing behavior changes. Spyware consumes resources. That leads to High data usage, slower performance, and overheating. If you search online for “Why is my phone running slow,” spyware may be the cause.
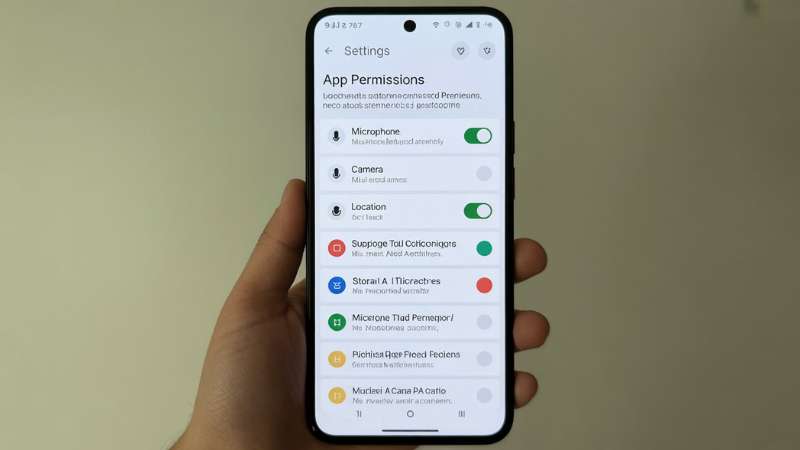
You should also inspect app permissions. Check for Suspicious app permissions like microphone access for a flashlight app. Monitor sudden spikes in data. Run a trusted Malware scan using reputable Antivirus software. To Detect unauthorized device access, review your Google account login history. Unfamiliar logins may signal compromise. These steps help you Monitor suspicious phone activity before serious damage occurs.
How to remove spyware from Android
Once you confirm infection, act quickly. Start by restarting your phone in Safe mode Android. Safe mode disables third-party apps temporarily. If issues stop, an app is responsible. Next, remove suspicious applications and revoke administrator rights.
After uninstalling unknown apps, perform Browser cache clearing to remove tracking scripts. Run a full Malware scan again. If spyware persists, perform a Factory data reset. This wipes all data and removes deep infections. Afterward, carefully Restore Android after factory reset using secure backups only. These steps explain clearly How to remove spyware from Android without professional tools.

Protect your Android phone from spyware
Prevention is stronger than repair. Regular Android OS updates patch security flaws. Enable Two-factor authentication (2FA) for all major accounts. Always use Secure websites (HTTPS) when entering passwords. These habits help you Protect personal data on mobile devices.
To Secure your smartphone from hackers, install reliable Antivirus software and keep Google Play Protect enabled. Avoid public USB charging ports. Never click unknown SMS links. These simple actions strengthen Mobile cybersecurity protection. They also help you Protect privacy on Android devices and prevent future infections.
How to Detect and Remove Spyware From an Android Phone
Let us bring everything together. First, identify warning signs such as overheating or unusual data spikes. Next, check permissions and run a security scan. Then remove suspicious apps using safe mode. Finally, reset the device if needed.
Understanding How to Detect and Remove Spyware From an Android Phone empowers you. It allows you to act before criminals exploit your information. Quick response reduces financial loss and prevents long-term damage.
Want to stay up to date on Kaspersky news?
Cyber threats evolve daily. Security researchers publish new findings each month. Following trusted cybersecurity sources keeps you informed about emerging Android security threat trends.
Staying updated helps you Protect your Android from stalker ware, detect new spyware strains, and adapt quickly. Cybersecurity is not a one-time task. It is an ongoing commitment.
for other guide please check this step by step guide How to Know If You Can Get Back a Deleted Facebook Account (7 Clear Steps)
Conclusion
Your Android phone is more than a device. It is your wallet, diary, and communication hub. Ignoring security risks invites trouble. Spyware thrives on silence and delay. Acting early makes all the difference.
Now you understand How to Detect and Remove Spyware From an Android Phone clearly and confidently. You know the warning signs. You know the removal steps. Most importantly, you know how to prevent future infections. Practice safe browsing. Update regularly. Question unusual behavior. When you take control of your digital habits, you shut the door on spyware for good.
Frequently Asked Questions (FAQ)
How do I check if there is spyware on my Android phone?
Look for unusual battery drain, high data usage, unknown apps, or strange pop-ups. Run a trusted antivirus scan and review app permissions in Settings.
How do I find hidden spy apps on my phone Android?
Check the full Apps list including system apps and review device administrator access. Remove unfamiliar apps and scan your phone with security software.
How do I know if my phone is being monitored on Android?
Signs include background call noises, overheating, messages marked as read, or sudden slow performance. Check account activity and change passwords immediately if suspicious.
How to remove spyware from Android phone for free?
Boot into Safe Mode, uninstall suspicious apps, and run a free antivirus scan. If needed, perform a factory reset after backing up your data.
How do I check if my phone is linked to another phone on Android?
Open your Google account and review the Devices section for unknown logins. Remove unfamiliar devices and enable two-factor authentication.

Losing access to a Facebook account can be confusing, especially when you don’t know whether it was deleted permanently or can still be recovered. Visit Facebook Help Center for (account deletion / recovery page) Many users panic after seeing login errors or missing profiles and start trying random recovery tricks that never work.
If you are searching for how to know if you can get back a deleted Facebook account, this guide explains the difference between deleted and disabled accounts, the exact recovery steps that work, and how to protect your account in the future without false promises.
Understanding the Difference: Deleted vs. Disabled Accounts
This is the most important step, and most people get it wrong.
Deleted Facebook Account
- Deleted by the user
- Can be recovered only within 30 days
- After 30 days, deletion becomes permanent
- Login and password recovery stop working
Disabled Facebook Account
- Disabled by Facebook due to policy or security issues
- Account still exists in Facebook’s system
- Can often be recovered through appeal and verification
Knowing this difference tells you whether recovery is possible or not.
Acting Quickly After Deletion
If you deleted your Facebook account yourself, time matters.
- Facebook gives a 30-day grace period
- Logging in during this time cancels deletion
- Waiting too long makes recovery impossible
If less than 30 days have passed, stop reading and try logging in immediately.
Using Facebook’s Official Recovery Tools
Always use Facebook’s official tools, not random websites.
Try these first:
- Facebook login page
- “Forgot Password” option
- Account recovery forms
If Facebook still recognizes your email or phone number, your account is not permanently deleted.
Recovering a Disabled Account
If your account was disabled instead of deleted:
- Facebook usually shows a “Your account has been disabled” message
- You may see an option to submit an appeal
Steps:
- Open Facebook’s appeal form
- Enter your registered email or phone number
- Follow on-screen instructions
Disabled accounts often have better recovery chances than deleted ones.
Checking Your Email
Your email inbox gives important clues.
Check for:
- Facebook security alerts
- Deletion confirmation emails
- Appeal or review messages
If Facebook recently emailed you about your account, it usually means the account still exists.
Using Trusted Contacts
If you set up Trusted Contacts earlier, they can help you recover access.
- Facebook sends recovery codes to trusted friends
- This works only if the account is still active or disabled
- It does not work for permanently deleted accounts
This option is often overlooked but useful.
Identity Verification
For disabled or locked accounts, Facebook may ask for identity proof.
What usually works:
- Government-issued ID
- Clear photo (not blurry)
- Correct name matching your profile
Recovery may take days or weeks, so patience is important.
Avoiding Third-Party Scams
Be careful many websites promise:
“Guaranteed Facebook recovery”
“Hack your account back”
“Pay to recover deleted ID”
These are scams.
Facebook never charges money for account recovery.
Using third-party tools can make things worse or lead to data theft.
Strengthening Your Account for the Future
If you recover your account or create a new one secure it properly:
- Enable two-factor authentication
- Save backup recovery codes
- Verify email and phone number
- Avoid suspicious links and fake copyright notices
Prevention is easier than recovery.
How Level Up PR Can Help
If your Facebook account is important for business, branding, or public presence, professional guidance can help you understand account risks, recovery options, and online reputation management.
please visit for more guide How to know if your Facebook account is hacked
How to Sell Gift Cards Online in 2026: Easy Cash Guide
Final Thoughts
You can get back a deleted Facebook account only if:
- Less than 30 days have passed
- Facebook still recognizes your login details
After permanent deletion, recovery is not possible.
If you want to know how to know if you can get back a deleted Facebook account, always check:
- Login access
- Password recovery
- Time passed since deletion
- Account status (deleted vs disabled)
Understanding these points saves time, stress, and false hope.
FAQ
How to know if you can get back a deleted Facebook account?
If login and password recovery still work and less than 30 days have passed, recovery is possible.
Can Facebook recover an account after 30 days?
No, permanently deleted accounts cannot be restored.
Is a disabled Facebook account recoverable?
Yes, disabled accounts can often be recovered through appeal and identity verification.


How to Remove a Virus from Android (Complete Guide 2026)

Spring/Summer 2026 Fashion Trends You Can Shop Now

How to Detect and Remove Spyware From an Android Phone 2026


-

 Blog8 months ago
Why ’90s Fashion Still Dominates Today’s Style Scene
-

 How-to Guides8 months ago
How to Restore Pantone Colors in New Illustrator Versions (2026 Guide)
-

 Blog7 months ago
Reddit Politics in 2026: How Online Political Discourse Shapes Opinions
-

 Blog8 months ago
Top Fashion Trends to Follow in August 2025
-

 Entertainment8 months ago
Trending Soundtrack: “KPop Demon Hunters”